Slides are available here:
Tezos development with Chinstrap

- Docs 📖 : https://chinstrap.io/docs
- Tele 💬 : https://t.me/chinstrap_io

Slides are available here:
Tezos development with Chinstrap
We developed, tested, and originated a FA1.2 contract to our Flextesa sandbox in our previous post. In this post, we will do the same, but instead of using Chinstrap cli, we will use Chinstrap REPL.
Please read the Part-1 of this 2-part series on how to use Chinstrap to create, test and deploy Tezos smart contracts.
Chinstrap's read–eval–print loop (REPL) is a simple interactive development environment that takes a single command/method call, executes them, and returns the result. Using repl makes interacting with the deployed contracts on the chain easy.
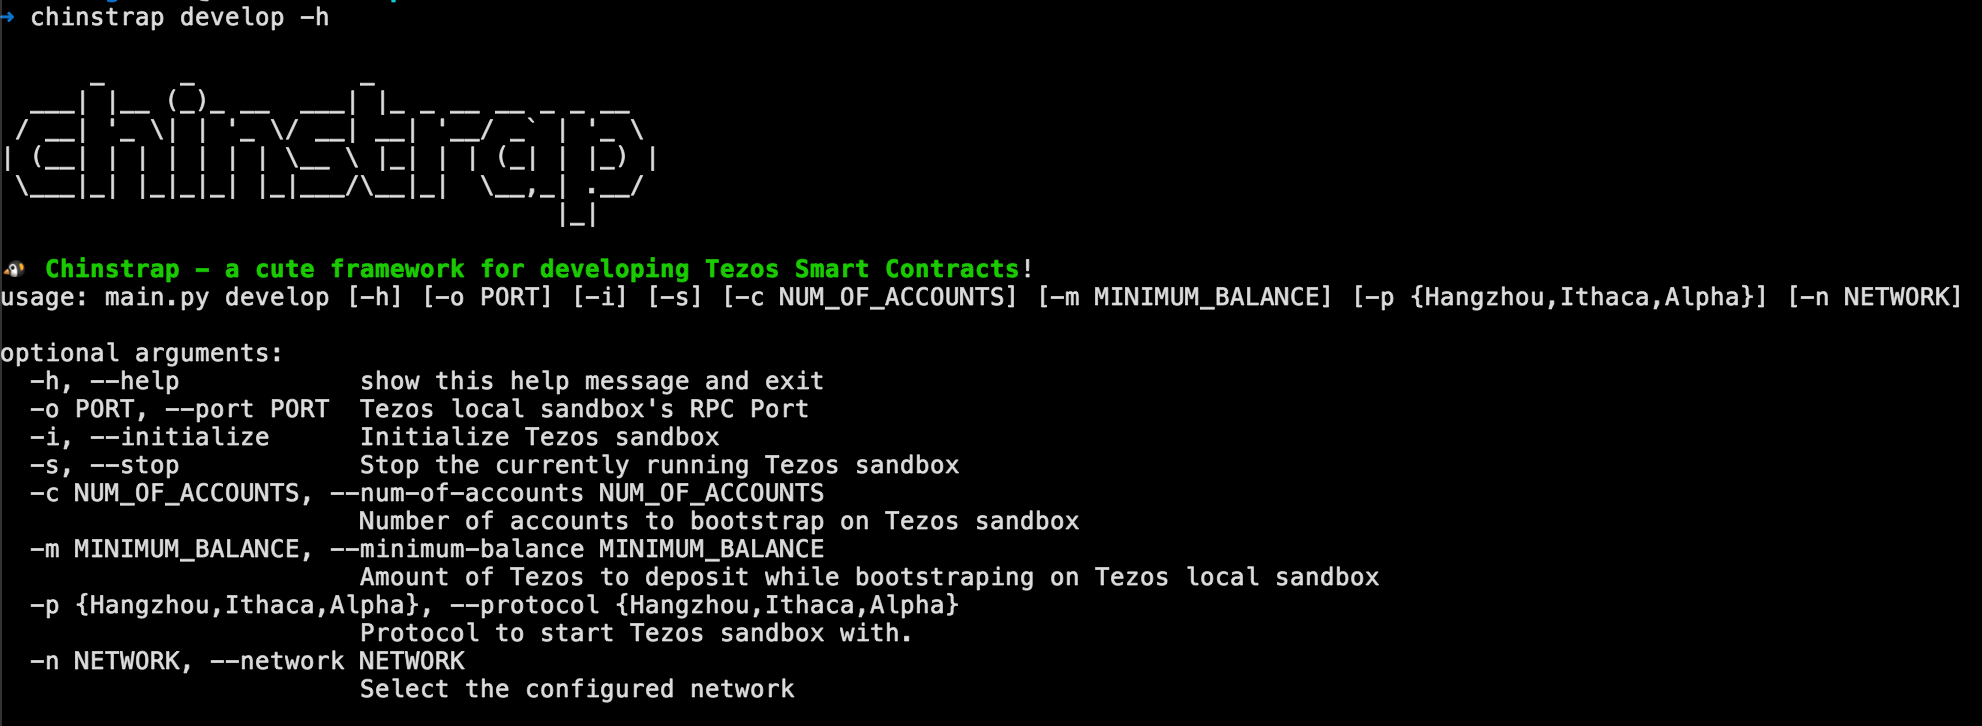
Chinstrap provides a develop sub-command that provides a repl to develop interactively. chinstrap develop launches a powerful repl, exposing Chinstrap's functionality to the repl, making the interaction with Tezos networks much more effortless.
chinstrap develop -h
Please clone the ChinToken repo from ant4g0nist/ChinToken.
When we launch Chinstrap's repl, we can either start the Flextesa sandbox or directly connect to any configured network in chinstrap-config.yml file.
The following process remains for all the networks.
The configuration for the local development should like:
chinstrap:
  network:
    development:
      host: http://localhost:20000
      accounts:
        - privateKeyFile: ./.secret
  compiler:
    lang: smartpy
    test: smartpy
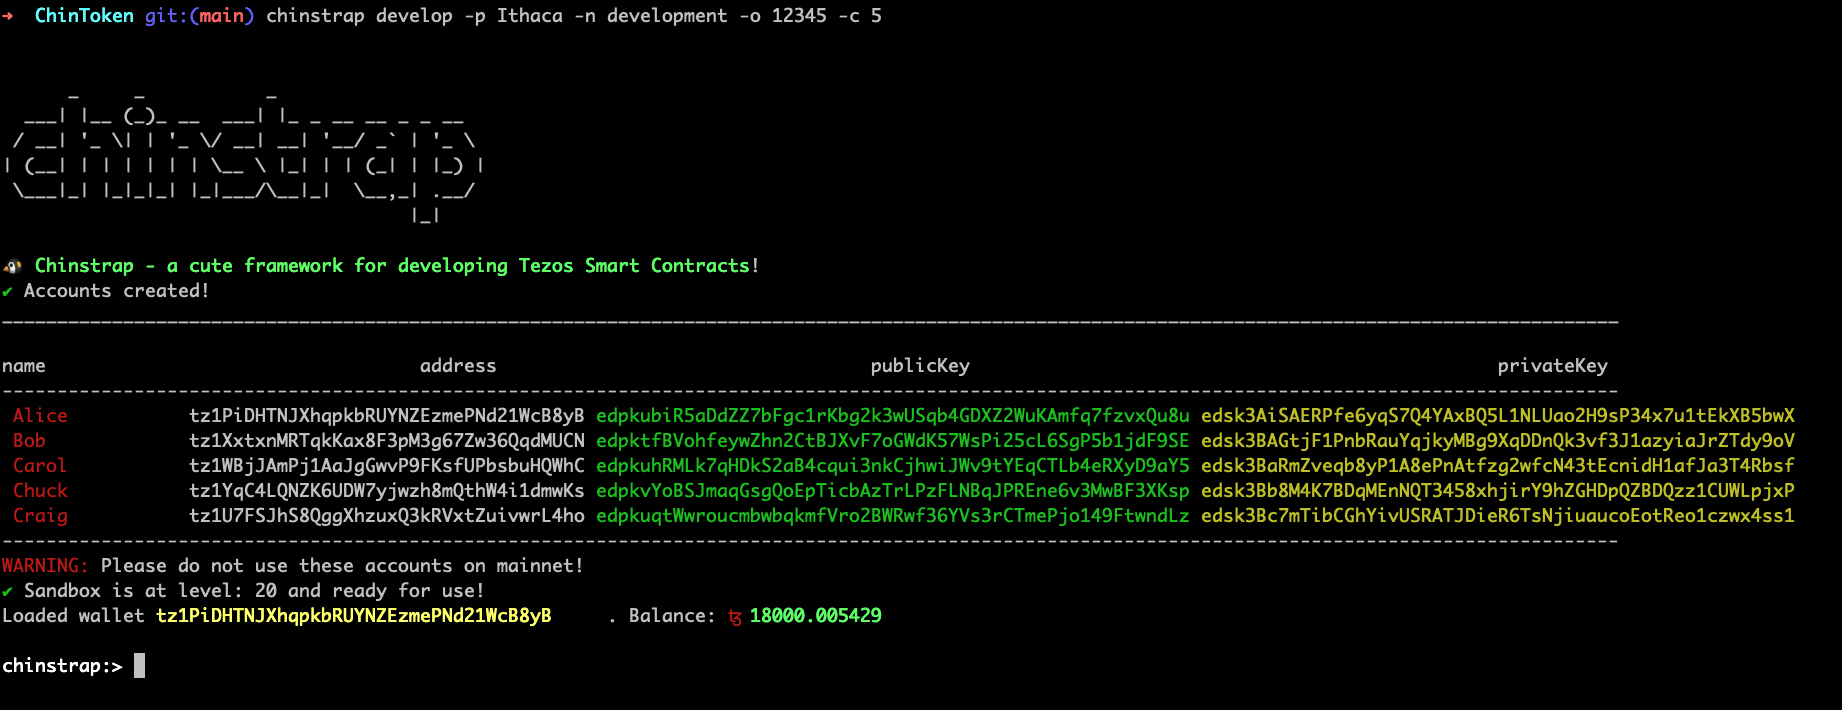
To start a local sandbox on port 20000, generate 5 test accounts and use Ithaca protocol, and launch the repl, run the following command:
chinstrap develop -p Ithaca -n development -o 20000 -c 5
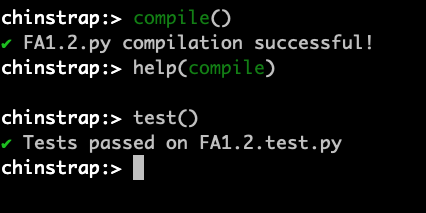
Chinstrap repl also has a compile function that compiles contracts inside contracts folder.
chinstrap:> compile()
✔ FA1.2.py compilation successful!
chinstrap:>
Chinstrap repl also has a test function that runs tests inside the tests folder.
chinstrap:> test()
✔ Tests passed on FA1.2.test.py
chinstrap:>
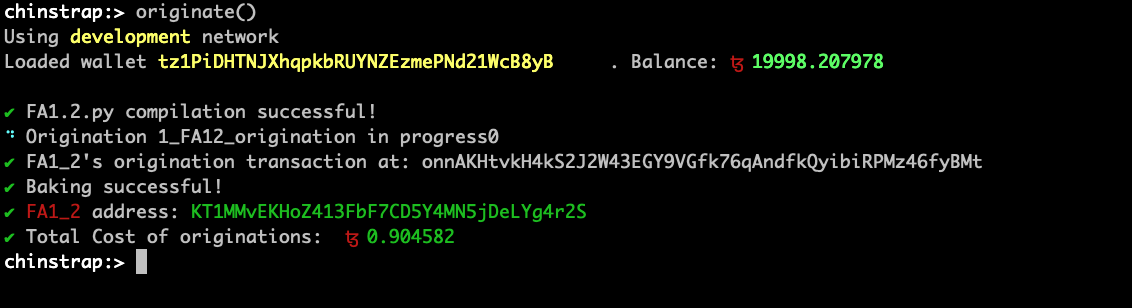
Chinstrap repl provides originate method to originate contracts.
Now that we have originated the contract, things get a little more interesting. We can use the repl interface to interact with the contract.
Chinstrap exposes getContractFromAddress function through which we can get the contract interface from an address.
chinstrap:> contract = getContractFromAddress('KT1MMvEKHoZ413FbF7CD5Y4MN5jDeLYg4r2S')
Now you can inspect and call the FA1.2 entrypoints on the contract object.
For example, to access the contract's storage:
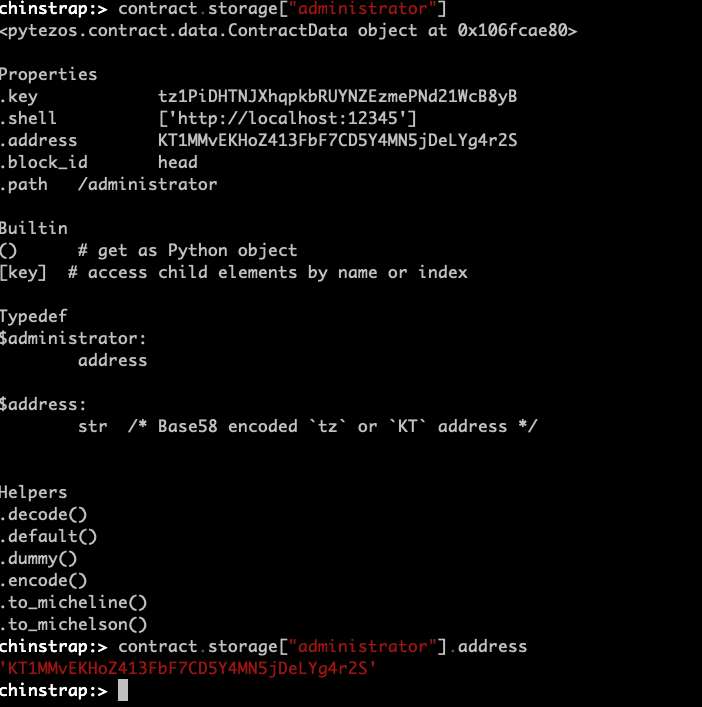
For further reading on all the available methods in the REPL, please check chinstrap/repl and (Inspecting Tezos smart contracts with PyTezos library)[https://baking-bad.org/blog/2019/03/24/inspecting-tezos-smart-contracts-with-pytezos-library/]
Stop the sandbox after the completion of testing.
chinstrap:> stopSandbox()
or
Run this in after exiting the repl:
chinstrap sandbox -s
Chinstrap's REPL is a more excellent way to interactively work with your contracts for testing and compiling or executing transactions by hand. Chinstrap's integration with Sandbox and Pytezos makes it a cleaner and more accessible interface for developing in the Tezos environment.
Join the telegram for further discussions: https://t.me/chinstrap_io Follow us on Twitter for continuous updates: https://twitter.com/chinstrap_io
Happy Hacking 👾 🎉
This blog will show how to create, test and deploy Tezos smart contracts using Chinstrap. Let's try to build a simple FA1.2 smart contract in SmartPy that has the following functionalities:
Let's start by installing Chinstrap. I will use a macOS for this tutorial.
Install dependecies on macOS:
brew tap cuber/homebrew-libsecp256k1
brew install libsodium libsecp256k1 gmp
and on Ubuntu, Debian and other apt-based distributions:
apt install libsodium-dev libsecp256k1-dev libgmp-dev pkg-config
To install Chinstrap:
pip3 install -U chinstrap
In case secp256k1 or gmp cannot find either include or lib paths, try explicitly set environment vars:
export CFLAGS="-I`brew --prefix gmp`/include -I`brew --prefix libsecp256k1`/include"
export LDFLAGS="-L`brew --prefix gmp`/lib -L`brew --prefix libsecp256k1`/lib"
pip3 install . -U
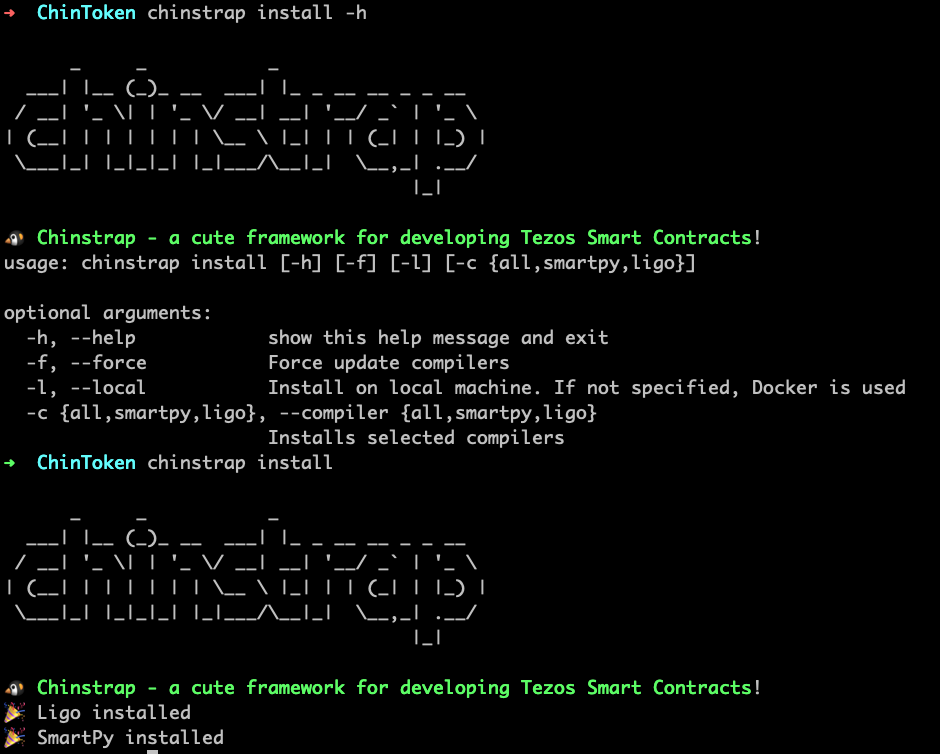
After installing Chinstrap, we have to install the ligo/SmartPy compilers.
chinstrap install
Chinstrap provides a sub-command to initialize a new Chinstrap project. Create an empty folder and initialize the project by running chinstrap init.
mkdir ChinToken
cd ChinToken
chinstrap init

For convenience, Chinstrap provides a flag to generate new mnemonic and secret without a passphrase.
chinstrap init -h
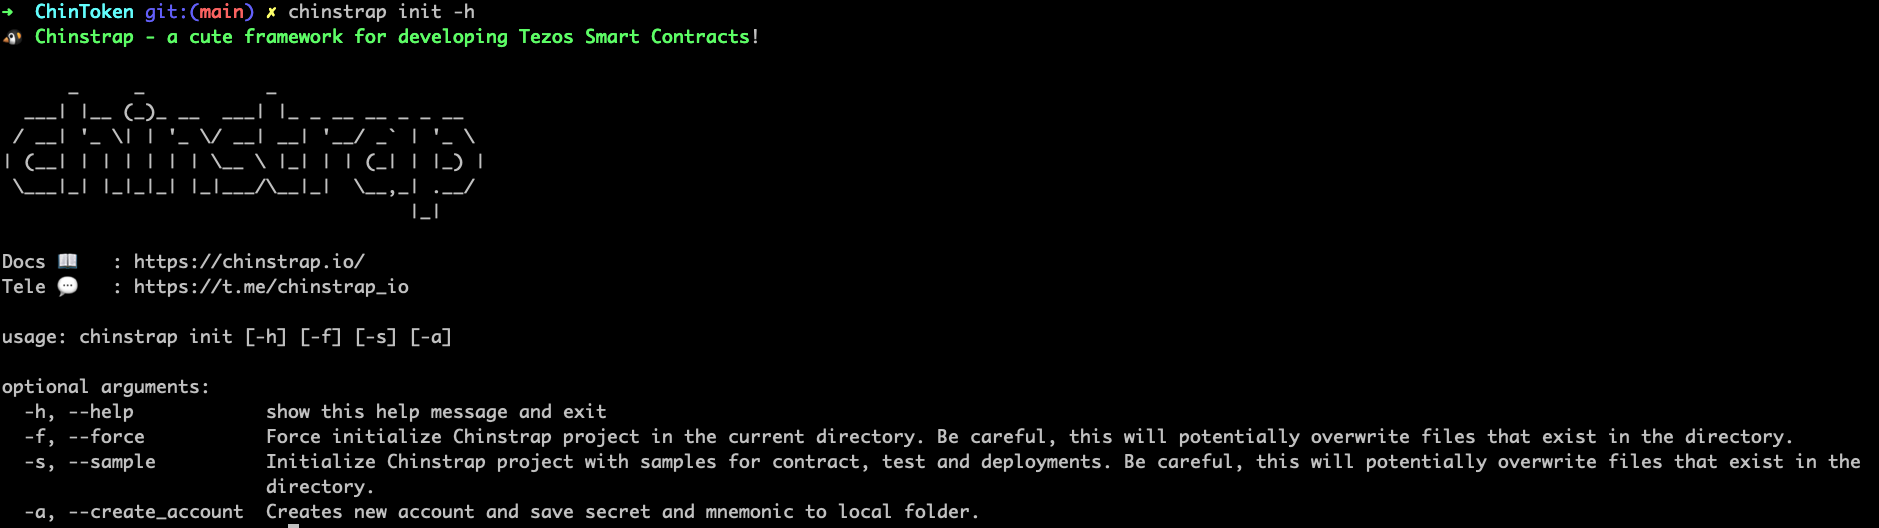
You can find the mnemonic inside the .mnemonic file and the private key inside .secret file
For this blog, I am going to use a test private key generated by chinstrap sandbox command which we will see how to use in the following sections.

Chinstrap configuration file is a YAML file that tells chinstrap, which account and network to use for origination, and which compiler to use for compilation and testing. A minimal configuration chinstrap-config.yml file for our ChinToken project looks like this:
chinstrap:
  network:
    development:
      host: http://localhost:20000
      accounts:
        - privateKeyFile: ./.secret
  compiler:
    lang: smartpy
    test: smartpy
We can get the FA1.2 implementation from SmartPy/Ligo by running the chinstrap templates command.
➜ chinstrap templates -h

🐧 Chinstrap - a cute framework for developing Tezos Smart Contracts!

      _     _           _
  ___| |__ (_)_ __  ___| |_ _ __ __ _ _ __
 / __| '_ \| | '_ \/ __| __| '__/ _` | '_ \
| (__| | | | | | | \__ \ |_| | | (_| | |_) |
 \___|_| |_|_|_| |_|___/\__|_|  \__,_| .__/
                                     |_|

Docs 📖   : https://chinstrap.io/
Tele 💬   : https://t.me/chinstrap_io

usage: chinstrap templates [-h] (-l {JsLIGO,PascaLIGO,CameLIGO,ReasonLIGO,SmartPy} | -f)

optional arguments:
  -h, --help            show this help message and exit
  -l {JsLIGO,PascaLIGO,CameLIGO,ReasonLIGO,SmartPy}, --language {JsLIGO,PascaLIGO,CameLIGO,ReasonLIGO,SmartPy}
                        Target language to search templates for.
  -f, --fa1-2-smartpy   Create FA1.2 contract, test and origination template
Let's create FA1.2 templates by running chinstrap templates -f
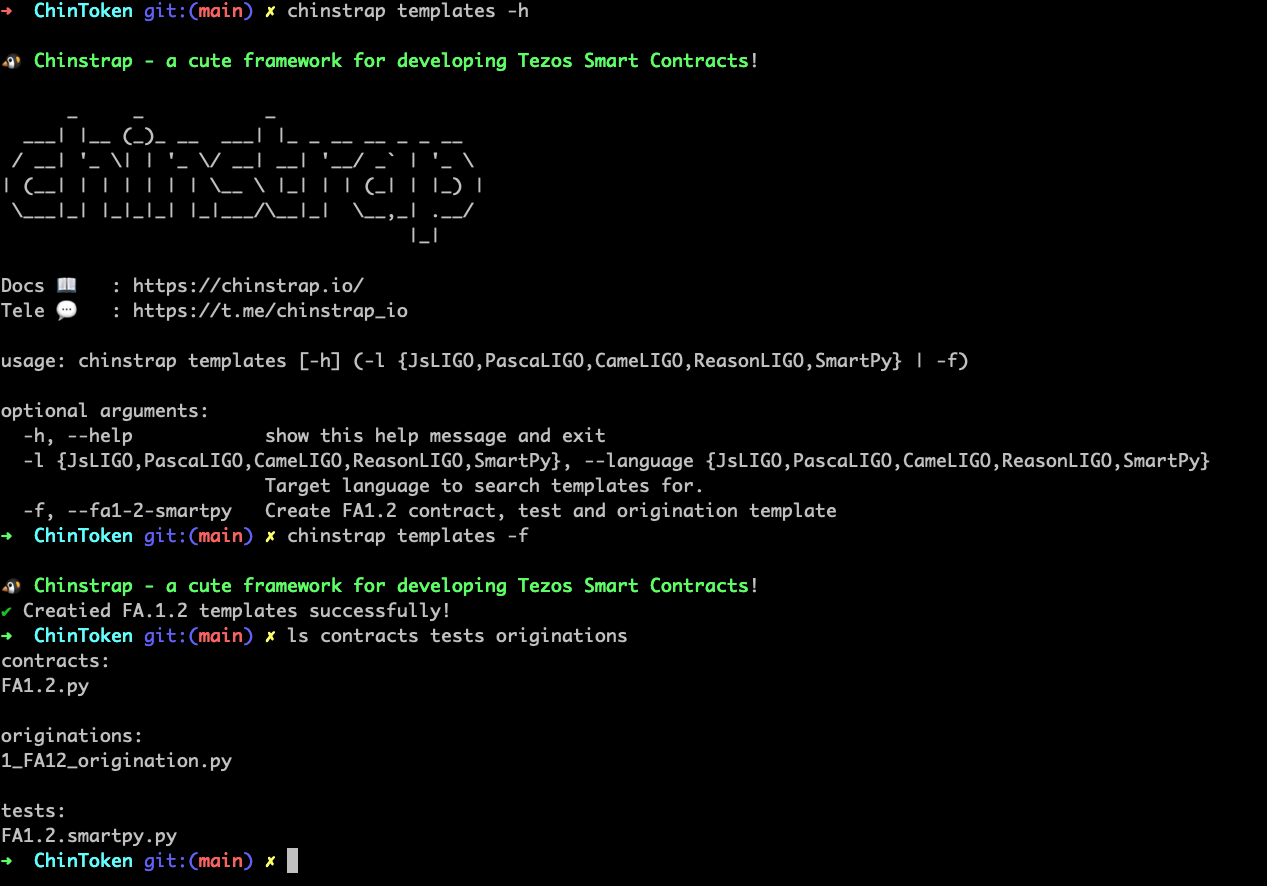
This creates 3 files:
Ok, now we are ready to compile the test 🕺💃
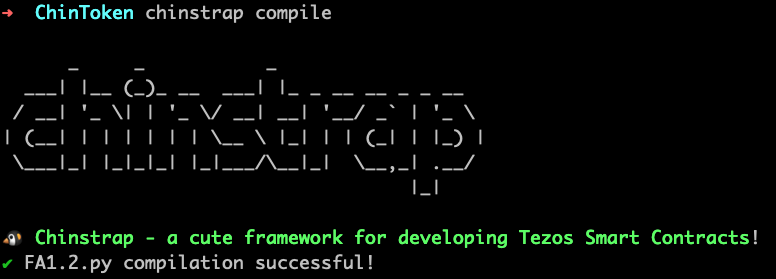
Chinstrap provides a compile sub-command that picks the contracts from contracts/ folder based on configured compiler:lang in the chinstrap-config.yml configuration file.
chinstrap compile
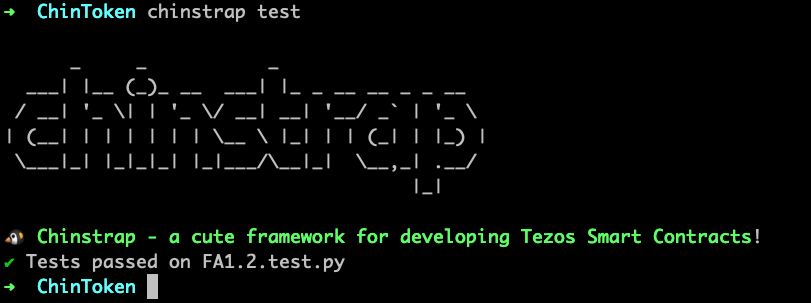
Chinstrap provides a test sub-command that picks up the tests from the tests/ folder based on the configured compiler:test in the configuration file.
At this point, the smart contracts are compiled and ready to be originated. We are ready to originate or deploy our smart contracts onto the configured network. We will use Flextesa sandbox as a local node to test our originations.
For a detailed explanation of how originations work with Chinstrap, please read the documentation available here: Originating smart contracts with Chinstrap
Our origination for this FA1.2 looks like this:
from chinstrap.originations import getContract

def deploy(chinstrapState, network, accounts):
    contract = getContract("FA1_2")

    initial_storage = contract.storage.encode(
        {
            'administrator': accounts[0].key.public_key_hash(),
            'balances': {},
            'metadata': {},
            'paused': False,
            'token_metadata': {
            },
            'totalSupply': 0
        }
    )

    return initial_storage, contract
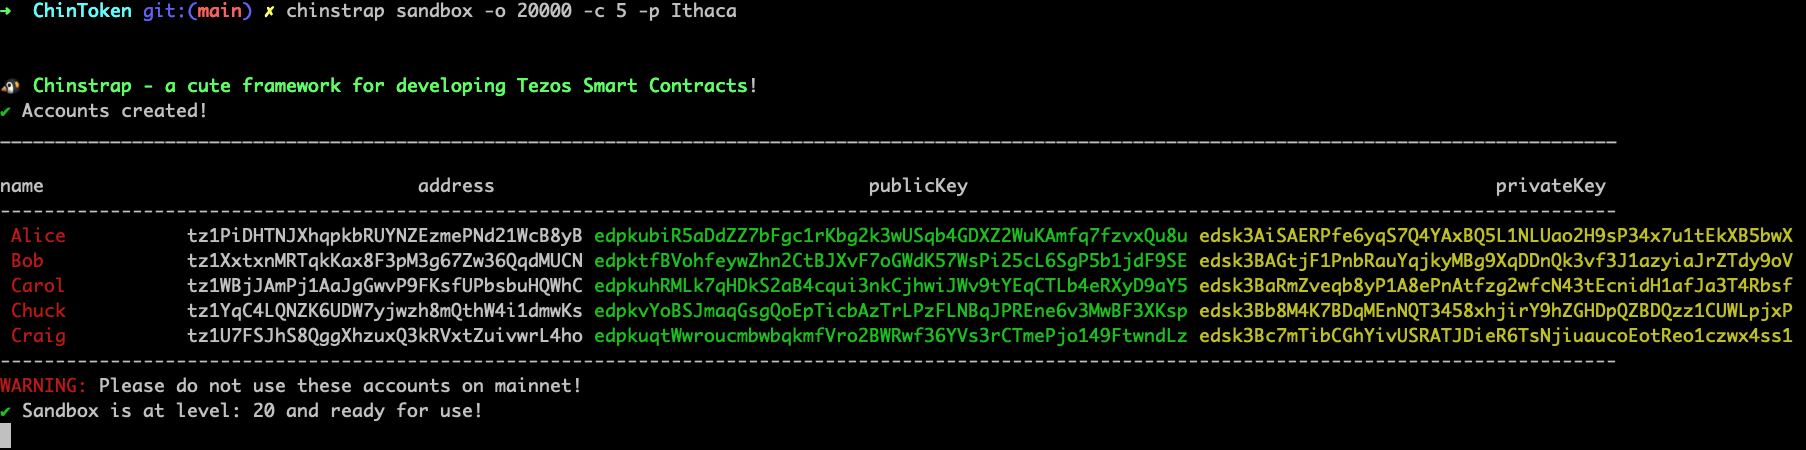
Let's originate on our local flextesa sandbox. Let's initialize the sandbox before we start running it. We can initialize the sandbox by running
chinstrap sandbox -i
Now, we can start the sandbox in synchronous mode by running
chinstrap sandbox -o 20000 -c 5 -p Jakarta
If you would like to run sandbox in the background or detached mode, you can pass -d or --detach flag when starting the sandbox
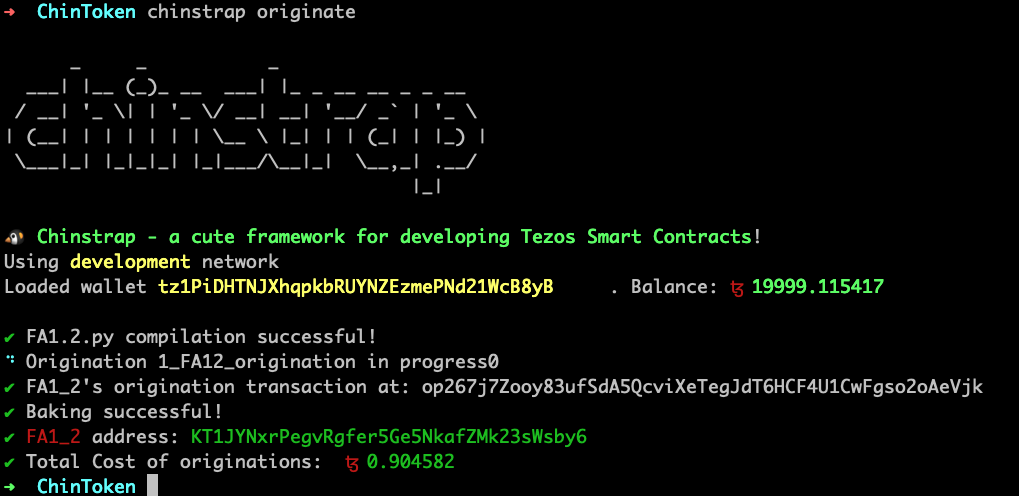
We can finally originate now. 🎉
chinstrap originate
Once you finished development and testing, you can stop the sandbox by running:
chinstrap sandbox -s
On origination, Chinstrap calculates and keeps track of the sha256 hash of the compiled contracts. This helps in preventing duplicate originations. If you want to re-originate the same contract, you can force chinstrap using the -f` or --force flag.
The first step in developing a Dapp is to deploy smart contracts. Chinstrap takes LIGO/SmartPy code and deploys it onto any public or private network. Each origination needs initial storage compliant with the Michelson code's storage type.
Thanks to its easy configuration and readable origination files, Chinstrap is an essential tool throughout the development and deployment of a Dapp.
In our next post, we will try to leverage Chinstrap 's repl to develop, test, originate and interact with the same FA1.2 contract we deployed in this blog. You can find the final code for this post in this repo: ant4g0nist/ChinToken
Happy Hacking 👾 🎉